I can't believe that our 3 day weekend is over already!!! Joe and I had a great weekend in St. Louis hanging out with his family and going to the wedding of our good friends Mandy and Paul. Now we're back home and just relaxing before heading back to work tomorrow. We're also trying to get our temporary cat friend to come out and play with us. Our friends Shayna and Greg are on vacation this week so we're cat sitting for their kitty, Chase. He really is a nice cat, but he's still trying to get used to everything in our house. We'll have him until Friday so hopefully by then he'll warm up to us a little more.

Last weekend after delivering the bowling ball cake, Joe and I came home and made some sushi for dinner. We like going to sushi restaurants for dinner every now and then, and about a year ago we decided to try making our own sushi at home. We did a little research and found that all we needed was sushi rice, seaweed paper (nori), rice vinegar (for making the rice sticky), and whatever fillings you want in your sushi roll. We've also found that it goes a lot smoother if you have 2 people working on making the rolls. Joe is the master rice handler and roller, and I take care of the filling and slicing. I took lots of pictures of Joe's rolling techniques since that seems to be the hardest part. Here's the breakdown of how to make some tasty sushi at home!
What you'll need:
- Sushi Rice (It is a special type of rice and you should just follow the directions on the bag for cooking, since it's a little different. We've found it in the Asian section of our regular grocery store.)
- Seaweed paper ("Nori", also found in the Asian section of the grocery store.)
- Fillings for your rolls (Things we like are smoked salmon, crab sticks, avocado, cucumber, cream cheese, carrots, apples, sauce, crunchy bits like Panko or crushed chips.)
- A bowl of water (to dip your fingers in to keep them from sticking to the rice.
Start by cooking your sushi rice according to the package directions. While it's cooking get all your filling options chopped and ready. I usually chop things in to long thin strips if possible. Also, we've never bought raw fish for making sushi, but if you can find sushi grade fish at your grocery store, go for it!
When you're ready to make the rolls, lay out a piece of nori on a sheet of wax paper. If you have an actual bamboo rolling mat then I'm sure that's even better, but wax paper works for us! The nori should be placed shiny side UP. Its kind of hard to tell which side is shinier than the other, but if you can figure it out then try and put the rice on the shiny side. Then use a spoon or spatula to spread out a thin layer of rice covering the entire paper, leaving approximately 1 to 1.5 inches of nori with no rice on it along the edge. If it's sticking to the spoon too much, then dip your fingers in water and use them to pat down the rice.
Then begin laying your fillings on top of the rice in a line. Keep them about an inch from the edge that has rice going all the way to the edge. Once you've got all the fillings you want, it's time to roll!
 |
| We put the cream cheese in a ziploc bag and snip the corner off to make it easy to add to the roll. |
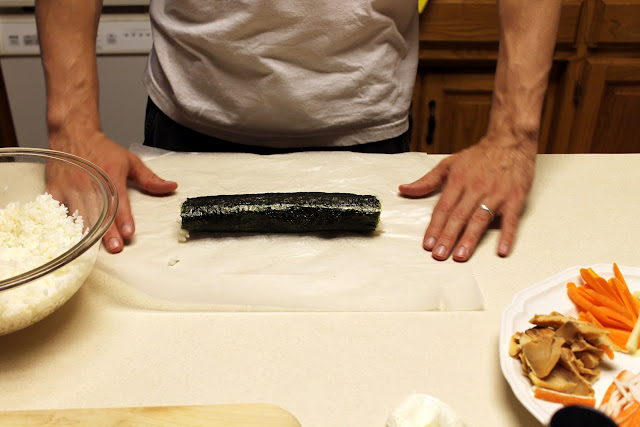
Keeping the wax paper on the outside, begin rolling the rice and nori up over the line of fillings that you laid out. Try to capture all the fillings within that inch or so that you left empty.
Once you've rolled it a little bit, kind of squeeze the wax paper to make sure that everything is good and tight. If you need to, pull the wax paper out some so it doesn't actually get rolled in with everything. It's really just there so you don't have to get your hands all stuck to the seaweed or rice.
Keep rolling, squeezing, and pulling the wax paper out until you've got a nice tight roll. When you get to the end of the nori that doesn't have any rice, dip your fingers back into the water and dab some along the edge of the nori. Then finish rolling completely and leave the seam on the bottom. The water will make the nori glue itself together at the seam.
Remove the roll from the wax paper and slice into individual pieces.
Then grab a fresh sheet of nori and start back over! We always end up making waaaaaay too much sushi, but we just eat it the next day or two for lunches. Here are all the flavor combinations we made:
(These go from left to right in the picture below.)
- Crab, shrimp, avocado, carrot, cucumber, cream cheese *this was one favorite*
- Crab, apple, avocado, crushed chips (for crunch)
- Smoked salmon, avocado, cream cheese
- Crab, apple, carrot, cucumber, teriyaki sauce *another favorite*
- Smoked salmon, avocado, apple, teriyaki sauce *another favorite*
- Crab, cucumber, avocado, cream cheese
We need to branch out and try some new fillings, so if any of you have any suggestions or ideas please let us know! Here are a couple more shots of the fillings in progress as well as the final product. I hope that if you enjoy eating sushi at restaurants but have been nervous to try it at home, that this will inspire you to just go for it! This is the 3rd or 4th time we've done it and Joe is pro at rolling now!


