Friday, May 10, 2013

How to Make Striped Cupcake Frosting

Hi! Happy Friday! Thank goodness it's the weekend, right? Have I mentioned how I really don't like going to work and basically live for the evenings at home and the weekend? Because I do. And this should be a pretty good weekend. Joe and I get to stay at home and we should make some pretty good progress on our built-ins. We're also going to do some garage saling (woo-hoo!!!) and just generally relax. Sounds good to me! Unfortunately we won't get to spend Mother's Day with either of our Moms but I hope they both have a wonderful Mother's Day. Same goes to all the other Moms who may be reading this! We love you ladies!


I've done quite a bit of baking in the past few weeks and one of the occasions I baked for was a Birthday Blessings delivery. Birthday Blessings recently added the option of letting the child decide if they'd like a cake or cupcakes, and the most recent one I signed up for was cupcakes. I must say it was way quicker than making and decorating a cake! They still give guidelines for favorite cake and icing flavors, as well as favorite colors. This little girl's favorite colors were pink and purple so I thought it would be fun to try the striped icing like I did on the St. Pat's Pot o' Gold muffins last year. I also picked out some pink, black and white cheetah print cupcake liners because they were cute :) Since I'd done this technique once before, I knew a couple tricks, but I also learned some things this go round. But overall, it's still pretty fool proof. Here's what you'll need:

 - A large pastry bag, probably 14" - 16" (you want it to be big enough to hold the icing for all the cupcakes at once)
- A 1M pastry tip (A large start tip)
- A large cup to old the icing bag
- Gel food coloring
- Toothpicks
- Buttercream Icing - I'd say 3-4 cups for 2 dozen cupcakes

First, place your pastry tip into the pastry bag. Then fold the the bag at the tip and place into your large cup. I fold the end over so that no icing leaks out, but also to let the bag go farther down into the bowl. Fold the edges of the pastry bag over the cup. Try and smooth out the inside so there aren't too many wrinkles.


Dip a toothpick into your first icing color and use it to "draw" a line of color inside the bag. One thing I learned this time is that the closer you can get the line to the bottom of the bag (toward the pastry tip), the less icing you'll waste waiting for the color to make it's way out. Continue drawing your lines of food coloring around the bag until you have all the colors you'd like.


Then pile in the icing! Be careful to not stir it around or anything. You want the stripes to stay in nice lines. What I learned the first time I tried this with the St. Pat's muffins was that you can't just go back and add more icing and expect the same results. The colors get squished together and don't come out very vibrantly. If you do have to refill your icing bag, I would recommend starting with fresh food coloring stripes. That's why you have to use a big bag!

I promise it all fit! I carefully lifted the bag out of the cup then kind of shook the icing down the rest of the way. 

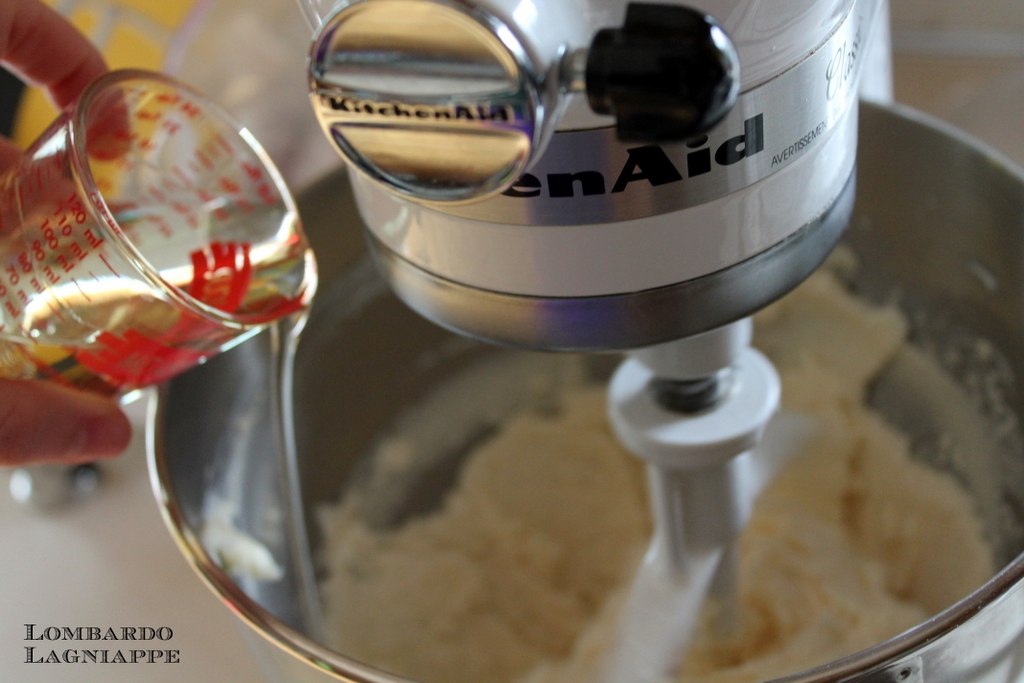
Once your bag is ready to go, start squeezing icing out until you start seeing the color. I had a few extra cupcakes so I iced those first, but still didn't see any color come out. So I squeezed some into my mixing bowl. Once the color started, I moved on to the rest of my cupcakes. You'll be able to tell that the first few were still a little light in color, but I was afraid that if I didn't start icing them, I'd run out before I was done. I had just enough though!

Even after icing 4 cupcakes, there was no color coming out yet. 

There's the color! 


I think they turned out cute and I hope the little girl liked them. These are really fun and easy if you need something in a certain color and you don't want to dye the entire batch of icing. Plus, people will be really impressed and will think they were store bought :) Even if you don't do the striped icing, using a pastry bag and the 1M pastry tip will make the icing look much more "professional" and believe me, it's way easier than trying to use a knife to spread on icing! Let me know if anyone tries this out, I'd love to see what you guys make! Have a great weekend!

Monday, May 6, 2013

Orange Amaretto Pound Cake

I sat down about 45 minutes ago to write this post. I uploaded my pictures, then got online and signed into blogger. Next thing I knew, I was on the local animal shelter website looking at all their adoptable pets. No idea how I got there. Must have blacked out :) Right now I honestly can't remember what train of thought led me to look for adoptable pets, but regardless, I found some cute ones. There was a chocolate lab named Chunkamuffin who looked like a sweetie-pie. She reminded me of another "chunky" lab I know :) Joe and I definitely need to make a stop by the shelter soon to play with the animals. We've gone a few times in the past and always have fun just petting and visiting the cats and dogs. I'm always sad to leave without a pet of my own to bring home, but hopefully it brightened the animals day and maybe got them a little more socialized so that they'll get adopted sooner. Eventually I'll wear Joe down and we'll come home with a little kitty or big dog :)

Now that I'm out of my cute animal trance, I can get back to the point of this post. I made this cake a couple weekends ago I guess, but I honestly just haven't felt like blogging since the last post. Spending all day at work just leaves me uninspired when I get home. Oh well, at least I have a job, right? That's what I keep telling myself. But there I go getting off track again! The reason for making this cake was simply to have something to test my baking goop on. The recipe came from the Vintage Cakes cookbook that Gracie gave me for Christmas. The Honey Bee Cake I made back in January was also from this book. However, if you go looking for an "Orange Amaretto Pound Cake" in the cookbook, you won't find it. The recipe I followed was actually for a Harvey Wallbanger Cake. It called for Galliano (a type of Italian liquor) but I didn't feel like buying some just for this cake, so I used Amaretto instead. Since the Galliano is what made it a Harvey Wallbanger Cake (named after a cocktail), I couldn't call what I was making by the same name. Hence the "Orange Amaretto Pound Cake". This cake was wonderful. Not too fancy, perfect for snacking, dense and very flavorful. Needless to say, I ate a lot of it. Here's the recipe:


Orange Amaretto Pound Cake
makes 1 bundt cake

2 cups all purpose flour
1 cup sifted cake flour
2 t. baking powder
1/2 t. fine sea salt
1 cup unsalted butter, at room temperature
2 cups sugar
2 t. vanilla extract
1/3 cup canola oil
5 eggs
1/2 cup orange juice
1/2 cup Amaretto (or Galliano for a true Harvey Wallbanger Cake)
1/4 cup vodka

Glaze:
1 1/2 cups sifted powdered sugar
5 T orange juice
*you could swap out some tablespoons of orange juice for amaretto or vodka, but I didn't want the glaze to be too boozy in case I decided to bring it to work.

- Preheat the oven to 350 degrees
- Grease and flour (or use baking goop) the inside of a fluted bundt pan.


- Sift together the flours, baking powder and salt into a bowl, then whisk the mixture by hand to ensure that the ingredients are well mixed.

When I bought this sifter for 25 cents at a garage sale, the lady selling it said, "you'll never use that". Ha! I showed her :) 

- Add the butter, sugar and vanilla to the bowl of a stand mixer. Using the paddle attachment, mix on medium high until fluffy, about 5 minutes.


- Reduce the speed to low and drizzle in the oil until incorporated. Return to medium-high speed and beat for another 2 minutes.


- Blend in the eggs one at a time, adding the next one just after the previous one is blended in. Stop the mixer frequently and scrape down the sides of the bowl and the paddle.

I've found that if you just put all the eggs in one measuring cup then, when you pour them out, they'll naturally pop out one at a time. 


- In a separate bowl, combine the orange juice, Amaretto and vodka. With the mixer on low speed, stir in the flour mixture into the butter mixture in 3 parts, alternating with the orange juice mixture. Beginning and ending with the flour mixture.


- Beat until just barely combined after each addition, scraping down the sides and bottom of the bowl between additions. Stop mixing just shy of complete incorporation and finish mixing by hand with a rubber spatula.

Go ahead, taste a spoonful. I won't judge :)

- Spread the batter into the prepared pan. Tap the pan firmly on the counter to settle the batter. Bake for 45 to 50 minutes or until a skewer poked into the cake comes out just barely clean. Remove from the oven and cool in the pan on a wire rack for 30 minutes. Then turn the cake out onto a cooling rack and finish cooling.


- To make the glaze, whisk the powdered sugar and orange juice together and drizzle over the cake. I placed my cake on a rack over a pan so I could collect the glaze that dripped and reuse it :)


That's it!  I know it sounds like a lot of steps, but it was simple and came together quickly. The hardest part is letting it bake then cool! I have several other posts on backlog that I need to share, so we'll see if I can motivate myself to do that this week. I hope you all have a good night and a great week. Talk to you later!

Tuesday, April 23, 2013

DIY Pan Release (Baking Spray)

Hey everyone. How are you all doing this week? For some reason it feels to me like it should already be Thursday or Friday, but unfortunately it's only Tuesday night. I guess I should be thankful since there are still quite a few things on my to do list before the weekend gets here. We're having what is *hopefully* the last cold snap of the spring here in KC. They're predicting some snow tomorrow, but it isn't supposed to stick. Then by this weekend it should be warm, so I'm thankful for that. Joe and I are ready to get our garden plants in the ground! Joe went around and took some pictures of our plants so I'll share a post on our garden plans soon. I know that I've also promised to show y'all the updated dining room, but the window frame STILL hasn't been painted. I'm waiting for some nice weather so I can have the window open while doing it since I have to paint the window sashes as well. Oh well, it will get done eventually. 

Our half marathon was last weekend and we both survived! Joe finished in 2 hours and 2 minutes and I came in at 2 hours and 18 minutes. I think we both felt pretty good during the race and definitely  had that running "high" when we were done. Then the pain set in. haha. Overall it was a good race and we both said that we'd like to run more half marathons in the future. If anyone is thinking about training for a race, I would definitely recommend a half marathon, but maybe try a 5k first :) They're fun and fast. 

I guess I should get to the point of this post now. As I'm sure you know, I bake a lot of cakes. (Just call me Captain Obvious). One of the most important things for me when I'm baking cakes is that the cakes turn out of the pans with out getting stuck. I've had several cakes get stuck and it can be very frustrating. For a while, I would use Crisco to grease the pan then line the bottom with wax paper. Then I'd grease the wax paper with Crisco and dust flour over the whole pan. That was a little tedious but it did the job. Then my Grandma told me about some baking spray sold only at the Dollar Tree that worked great so I decided to try that out. The spray was awesome and gave perfect results, but then they stopped selling it! I've checked several Dollar Trees but haven't had any luck. So I went back to the Crisco, wax paper, flour method. 
 

Just before making the elephant baby shower cake I saw a post on a blog called I am Baker talking about some homemade pan release "goop" that promised perfect cake turn outs every time. The process sounded simple enough so I gave it a try. The recipe is pretty simple:

Mix equal parts of the following:

- Vegetable shortening (Crisco)
- All purpose flour (you may want to sift it, but it isn't necessary)
- Vegetable or Canola Oil


Whisk them together until smooth. Done! Keep in an airtight container. 


I used this on the baby shower cake and it worked great! It was very simple to "paint" it into the cake pans with a pastry brush. I actually just used one of those silicon bristle brushes. In my rush to get the cake made, I didn't take any pictures to show how the pan release goop worked, so that mean I HAD to make another cake this weekend to show you :) Instead of using a simple square or round pan, I thought I would test it in a bundt pan. If the goop works on an intricate pan like that then it will be good in just about anything. 

Bundt pan, pre-"goop".


Ready for cake batter!

The turn-out off the bundt cake from the pan wasn't absolutely perfect, but it was way better than most other bundt cakes I've made. Here are some pics.

I just had to include a picture of my pretty vintage bundt pan :)

This was right after turning the cake out of the pan after letting it cool in the pan for 30 minutes as instructed by the recipe. Like I said, it wasn't perfect, but I think it's pretty good. 

I think the white spots are where there was a little too much goop, but the cake got covered in glaze, so they got covered. 

The cake I baked was delicious too so I'll be sure to post about it separately. I know that this goop probably isn't something that is practical for everyone to have around, but if you do bake often, it might be worth it. Using a good baking spray will obviously be easier, but sometimes it just isn't enough for some of the larger cake pans. If you do try it, let me know if you like it! Maybe start with a small batch like 1/4 cup of each part or something. 

I guess that's it for now. Have a great night! Or day depending on when you're reading this :)

Thursday, April 18, 2013

Personalized Wedding Dress Hanger

Hello! Are you all excited for the weekend? I am, but I'm also nervous. The half marathon is this weekend and Joe and I are both kind of nursing running injuries. My foot has been hurting since a run on Monday and Joe's knee is hurting him. Hopefully we can push through and make it 13.1 miles on Saturday though. I'm not sure if the rest of the weekend will be productive, but we'll see. This past weekend, I headed to Wichita on Saturday for a bridal shower and bachelorette party for my good friend, Chase. I've know Chase since our freshman year at Rolla. We lived on the same dorm floor then eventually shared a house with 3 of our other good friends. It was really fun to meet her new Wichita friends and relive some of our college days :) See you next week for the wedding, Chase! I drove home from Wichita on Sunday and spent most of the day recovering from our Saturday night out. Then sand volleyball started on Sunday night! I'm excited to be playing again.


This little project I have to show you is a present I made for Chase. I've seen these special coat hangers before in lots of wedding photo shoots but I'd never really thought of making one myself. You can buy one on Etsy and I think they run around $30. A couple weeks ago, my friend Shayna made one for a bachelorette party she went to and it got the wheels turning in my head. She gave some instructions on her blog and you can see them here. Based on her instructions, I went and bought a 100' spool of 14 gauge wire, and some wooden coat hangers. I didn't trust myself to just sketch out the name that I wanted to write with wire, so I searched for a couple more DIY instructions and one of them mentioned a free font you could download that had nice loopy letters that could be made with wire. That tutorial can be found here.

I started by taking the crossbar off of the coat hanger since the name would be going there. Then I downloaded the free font and printed out "Mrs. Hobbs". Next I used some needle nose pliers to start bending the wire. It took me a couple tries to get started. Bending the wire was harder than I expected. It took some practice to get it bent at the right spot. I also didn't clip the wire until I was done with the name. I think next time I'll use some round objects like pens to get nice smooth curves.


Once the name was done, I had Joe drill a couple holes partially through the coat hanger. Then I spray painted it navy blue and glued the wire name in place with small dabs of super glue. The final step was to add a little yellow bow. I think it turned out cute!


Some other variations I've seen are the bride and groom's first names with a heart in between (like my friend Shayna did), or maybe the wedding date or just "I do" instead of names. This would also be really cute if you got the small children's coat hangers and added the name to hang a special dress on. I have 2 coat hangers left from my pack of three and I just so happen to have 2 sisters getting married this year. So Mary and Sara, if you'd like a personalized wedding coat hanger, just let me know and I'd love to make you one :)

I guess that's it for tonight. I wish I had better "how-to" pictures for you guys, but I don't think they would have shown very much. Wish us luck on the half marathon this weekend! Oh, and happy birthday to Aunt Sharon (today) and to Dad (tomorrow)!

p.s. I try to keep things pretty light-hearted on the blog, but I just wanted to say that my thoughts and prayers are with the victims of the Boston marathon bombings, and also those affected by the explosion in Texas. It's sad to see the pain and panic, but inspiring that there are always people willing to rush in to the chaos to help a stranger. I'm thankful for those everyday heroes.

Sunday, April 7, 2013

Elephant Baby Shower Cake

Well, I think it's been about 3 weeks since I last wrote on here and all I've come up with to show you is another cake :) It's not that Joe and I haven't been doing other things, in fact it's quite the opposite. We've been busy around the house and we've also been out of town the last two weekends. I hope you all had a great Easter last weekend and got to spend some time with your family and friends. Joe and I spent Easter in Ohio with my family and it was great to see all of my grandparents as well as Mom, Dad, Grace, Mary and Michael. Needless to say, it was a full house :) We were only missing Sara and Andy. It was a bit of a whirlwind trip there and back, but we had a great time seeing everyone! On our drive back home to Kansas City we stopped in St. Louis to have Easter dinner with Joe's family. Then we headed back to St. Louis this Saturday to celebrate with Joe's family again with a baby shower for Joe's sister, Abby! Joe and I are SO excited for Abby and her husband, Albert, and we can't wait to meet our future niece or nephew this June!


We were supposed to drive to St. Louis on Friday night like we usually do but I was making a cake for the baby shower and there was no way I was finishing the cake on Thursday. After 5 or so more hours of working on it Friday night, we were ready to go first thing Saturday morning. The cake made the trip just fine and I got it set up without any issues. That's always the most stressful part for me and it worked out just fine this time. Since Abby and Albert aren't finding out ahead of time if they're having a little boy or girl, the baby shower was all decked out in blue and pink. The elephants on the cake come from the theme Abby picked for the baby's nursery. Joe's Mom, grandma, sister and aunt did a great job with all the food and decorations for the shower. Everything went smoothly and everyone had a great time!  Here are a few more pics of the cake. The top layer is homemade funfetti cake with vanilla bean buttercream, the middle is chocolate cake with chocolate, oreo buttercream filling and chocolate ganache crumb coat, and the bottom layer is lemon cake with lemon curd filling and vanilla bean buttercream. The white covering on the cakes is marshmallow fondant and the pink and blue parts are modeling chocolate.

The scalloped part on the top was not supposed to be all uneven like that. We'll just say it's "rustic"... or something. 

I used the wax paper transfer method again for the elephants and chevron stripes. 

Joe's sister, Maria, made those cute little elephants out of baby blankets! So cute!!!

As I said earlier, we really have been busy the last few weeks, but I feel like I don't have a lot to show for it! Once I paint the window trim in the dining room, I'll have some pictures to show you of that. I think we're FINALLY done with the snow and our flowers are starting to pop up. As usual we have more house projects that I'm hoping to share with y'all, but they seem to take longer than I'd like. We've got a couple more weekends out of town coming up, and the 1/2 marathon in two weeks (yikes!) so I'm not sure how many blog posts I'll be able to turn out, but we'll see. What have you all been up to? I wish I could keep up with you all better and I'd love to hear what you guys have going on!

I hope you all are having a great spring and either looking forward to a relaxing summer or maybe relaxing before a crazy busy summer. Have a good night!

Saturday, March 16, 2013

Pot O' Gold St. Pats Cake

Happy St. Patrick's Day to everyone! I hope it's the best ever :) If you've ever been to a Rolla, MO St. Pats celebration, then you know it's always the best ever. Although I couldn't be in Rolla for St. Pats this year, we did have a pot luck at work. I decided it was time to practice some of the things I learned in the cake class I recently watched online. Before I get to the cake, I just want to say that anyone interested in learning to use fondant or modeling chocolate to decorate should definitely take this class! She shows how to make your own fondant and modeling chocolate and also how to get super crisp edges and corners on both your buttercream icing and on the fondant. The class is taught by a lady who writes a blog called Jessicakes and she is truly an artist. If you click on the blog name link above, you can get a link to the class that will give you 50% off the price, bringing it to $20. I have to say I think it is totally worth the cost. I'd tried making modeling chocolate in the past and it was a complete failure. Also, I typically have a lot of trouble with my fondant. But using her recipes and methods (which were only slightly different from what I already used), I had MUCH more success. Anyway, just wanted to tell you about it :)


For this cake, I didn't really want to do a shaped cake, but instead wanted to work on my fondant covering skills and try the "wax paper transfer method" that is taught in the Jessicakes class. I opted to make an 8" six layer rainbow cake. I actually made the cake from scratch this time using a recipe for butter cake from the "Sprinkle Bakes" cookbook I got for Christmas. It was delicious! One of my coworkers said she thinks this is her favorite cake that I've made, taste wise anyway. here's a peek at the insides since I didn't get a picture after it was cut.


I covered the cake first with a Swiss meringue buttercream and tried to make it as smooth as possible. I did an upside icing technique that is also shown in the class and it worked very well. The only difficulty is that though I would typically use my bench scraper to smooth the cake, it is only 6" tall and my cake was 7" tall. So I had to get a little creative. I ended up using a piece of cardboard with a straight edge to smooth it. It wasn't perfect, but it worked pretty well. Then it was time to cover the cake with fondant. As usual, this was pretty nerve wracking for me. It took me two tries to roll the fondant out but once I got it on the cake, it worked great. I only had a couple little wrinkles at the bottom.

The trick to smooth fondant is continuing to pull the "skirt" out as you smooth.

The next step was to add the details. The green hills and rainbow were both made out of modeling chocolate and I used a "wax paper transfer method". Basically, you cut out all the pieces you want on the cake using templates, then you lay them out of wax paper that has been spread with a thin layer of Crisco. Once you get it all laid out, you brush a little bit of water/corn syrup mixture onto the design and pick up the entire wax paper "sticker" and wrap it around the cake. Of course this means you have to take good measurements so that your design matches up perfectly. As you'll see, ended up measuring once and cutting twice :)

Here I'm brushing the water/corn syrup mix on the modeling chocolate transfer. This method worked great!

After placing the transfer around the cake and peeling off the wax paper. 

womp womp. That's what I get for not measuring better. I just filled it in with a couple extra pieces. Then made it the back of the cake :)

Here's the final product!

The blue fondant is a little speckled looking because I mixed some blue modeling chocolate with the white fondant. 

I didn't get a great picture of the rainbow going down the side of the cake, but you can kind of see it here. 


I was very happy with how this cake turned out! I'll definitely be using these techniques again soon. In other news, Joe and I ran 10 miles today in our half marathon training! We're both hurting a little right now, but I have to say I'm pretty proud of us :) Also, all the wallpaper in our dining room is GONE and I'm almost done prepping the walls with paint. I'm trying to get as much done as I can this weekend and next since once Easter gets here, we won't really have a free weekend until sometime in May. But there are a lot of fun things coming up, so I'm excited about them. Thanks for reading and have a great night!

Monday, March 11, 2013

Braided Cinnamon Roll Bread

Happy Monday! I guess by the time most of you read this it will actually be Tuesday, so happy Tuesday too :) As usual, I was sad to go back to work today after a nice weekend at home. I FINALLY finished peeling wallpaper this weekend and can now get to work on repairing the walls and prepping for paint. I also bought an online cake course that I started watching this weekend that shows new, better ways to cover cakes with fondant. It's been great so far and I'm looking forward to using some of these techniques for a St. Pat's cake for our potluck at work this Friday! I didn't do any baking this weekend, but I did do some baking two weekends ago that I want to share with you now. One of the things I made was this braided cinnamon roll bread. I've been wanting to make a sweet version of the Braided Pesto Bread for a long time now so I finally decided to do it. The process was basically the same as the pesto bread, but I made a couple changes to the recipe. The end result was great! It tasted kind of like a king cake and Joe and I ate pretty much all of it in 2 days. It is best served warm but if you're impatient like me, room temperature is great too :)


Braided Cinnamon Roll Bread
Adapted from Braided Pesto Bread from "Confections of a Foodie Bride"

For the bread:
1 c. warm water
2 t. active dry yeast
2 1/2 c. flour
1 T. vegetable oil
2 T. honey
1 t. salt

For the filling:
4 T. butter, melted
3/4 c. brown sugar
2 t. cinnamon

For the glaze:
1 c. powdered sugar
1 T. milk
1 T. coffee
1/2 t. vanilla

- Pour the warm water into the bowl of your stand mixer or into a medium bowl and sprinkle the yeast over the water. Let that sit for about 10 minutes (it may take more) until the yeast bubbles up and becomes frothy. If that doesn't happen, then the yeast is no good and you need new yeast.

- Add the flour, oil, honey and salt to the yeast mixture and begin mix with the dough hook until the dough is smooth and elastic and pulls away from the side of the bowl. If kneading by hand, stir the mixture first then dump the dough onto a floured surface and knead until smooth.


- Place the dough in a bowl coated with a little oil and cover with a towel. Let rise in a warm place until doubled in size, about an hour.


- Once the dough is risen, preheat your oven to 425 degrees and dust your work surface with flour for rolling the dough. If you have parchment paper it is good to roll the dough out on that. But still dust it with flour.


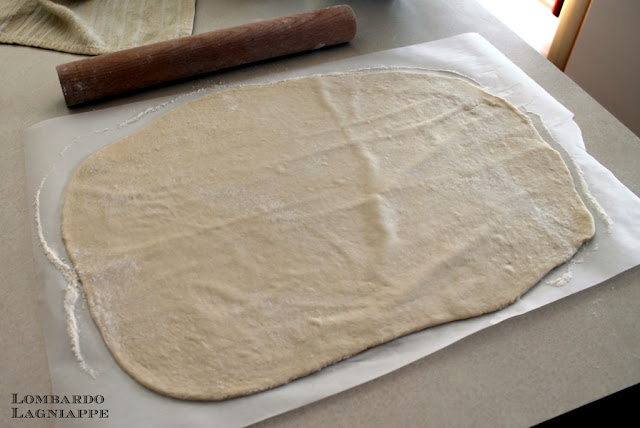
- Place the dough on the parchment paper and start rolling into a rectangle shape that is roughly 12" x 18".


- Melt the butter for the filling in a small bowl then brush or pour the butter over the rolled dough and spread it evenly leaving about an inch border around the edges.


- Mix the brown sugar and cinnamon together in a bowl and sprinkle over the melted butter on the dough. Leave a border around the edge.


- Tightly roll the dough into a long cylinder.


- Using a sharp knife or a bench scraper, cut the dough length wise. Then carefully twist the two pieces together into a rope. I had a bit of a hard time twisting this bread. I think it was because I rolled the dough much thinner than the first time.


- Carefully form the braided bread into a ring and pinch the ends together. You can then trim the excess parchment paper if needed. Slide the parchment paper onto a baking sheet and allow the bread to rest for another 15-20 minutes to rise again. * I made the mistake of sliding my bread onto the back side of a baking sheet, but then the butter sugar mixture leaked out during baking and onto the bottom of the oven, so be sure to put it on a cookie sheet that has a rim. *


- Bake for 25 minutes until golden brown. Let sit for a 10-15 minutes before mixing up the glaze.

Maybe I used too much filling? No, not possible :)

- Mix the glaze ingredients together and slowly pour over the finished bread. Enjoy!


This really was delicious and I wish I had some right now! Maybe I'll make it again this weekend :) I'm trying to think of other variations to make. Let me know if you have any suggestions!

I've still got a few backlogged posts to get out on here, but my nights might be busy with this St. Pat's cake for Friday so we'll see if I get anything written. Thanks for reading and have a great night!